
Writing Your Screenplay
Everything you need to know about the editor and screenplay elements.
The Editor
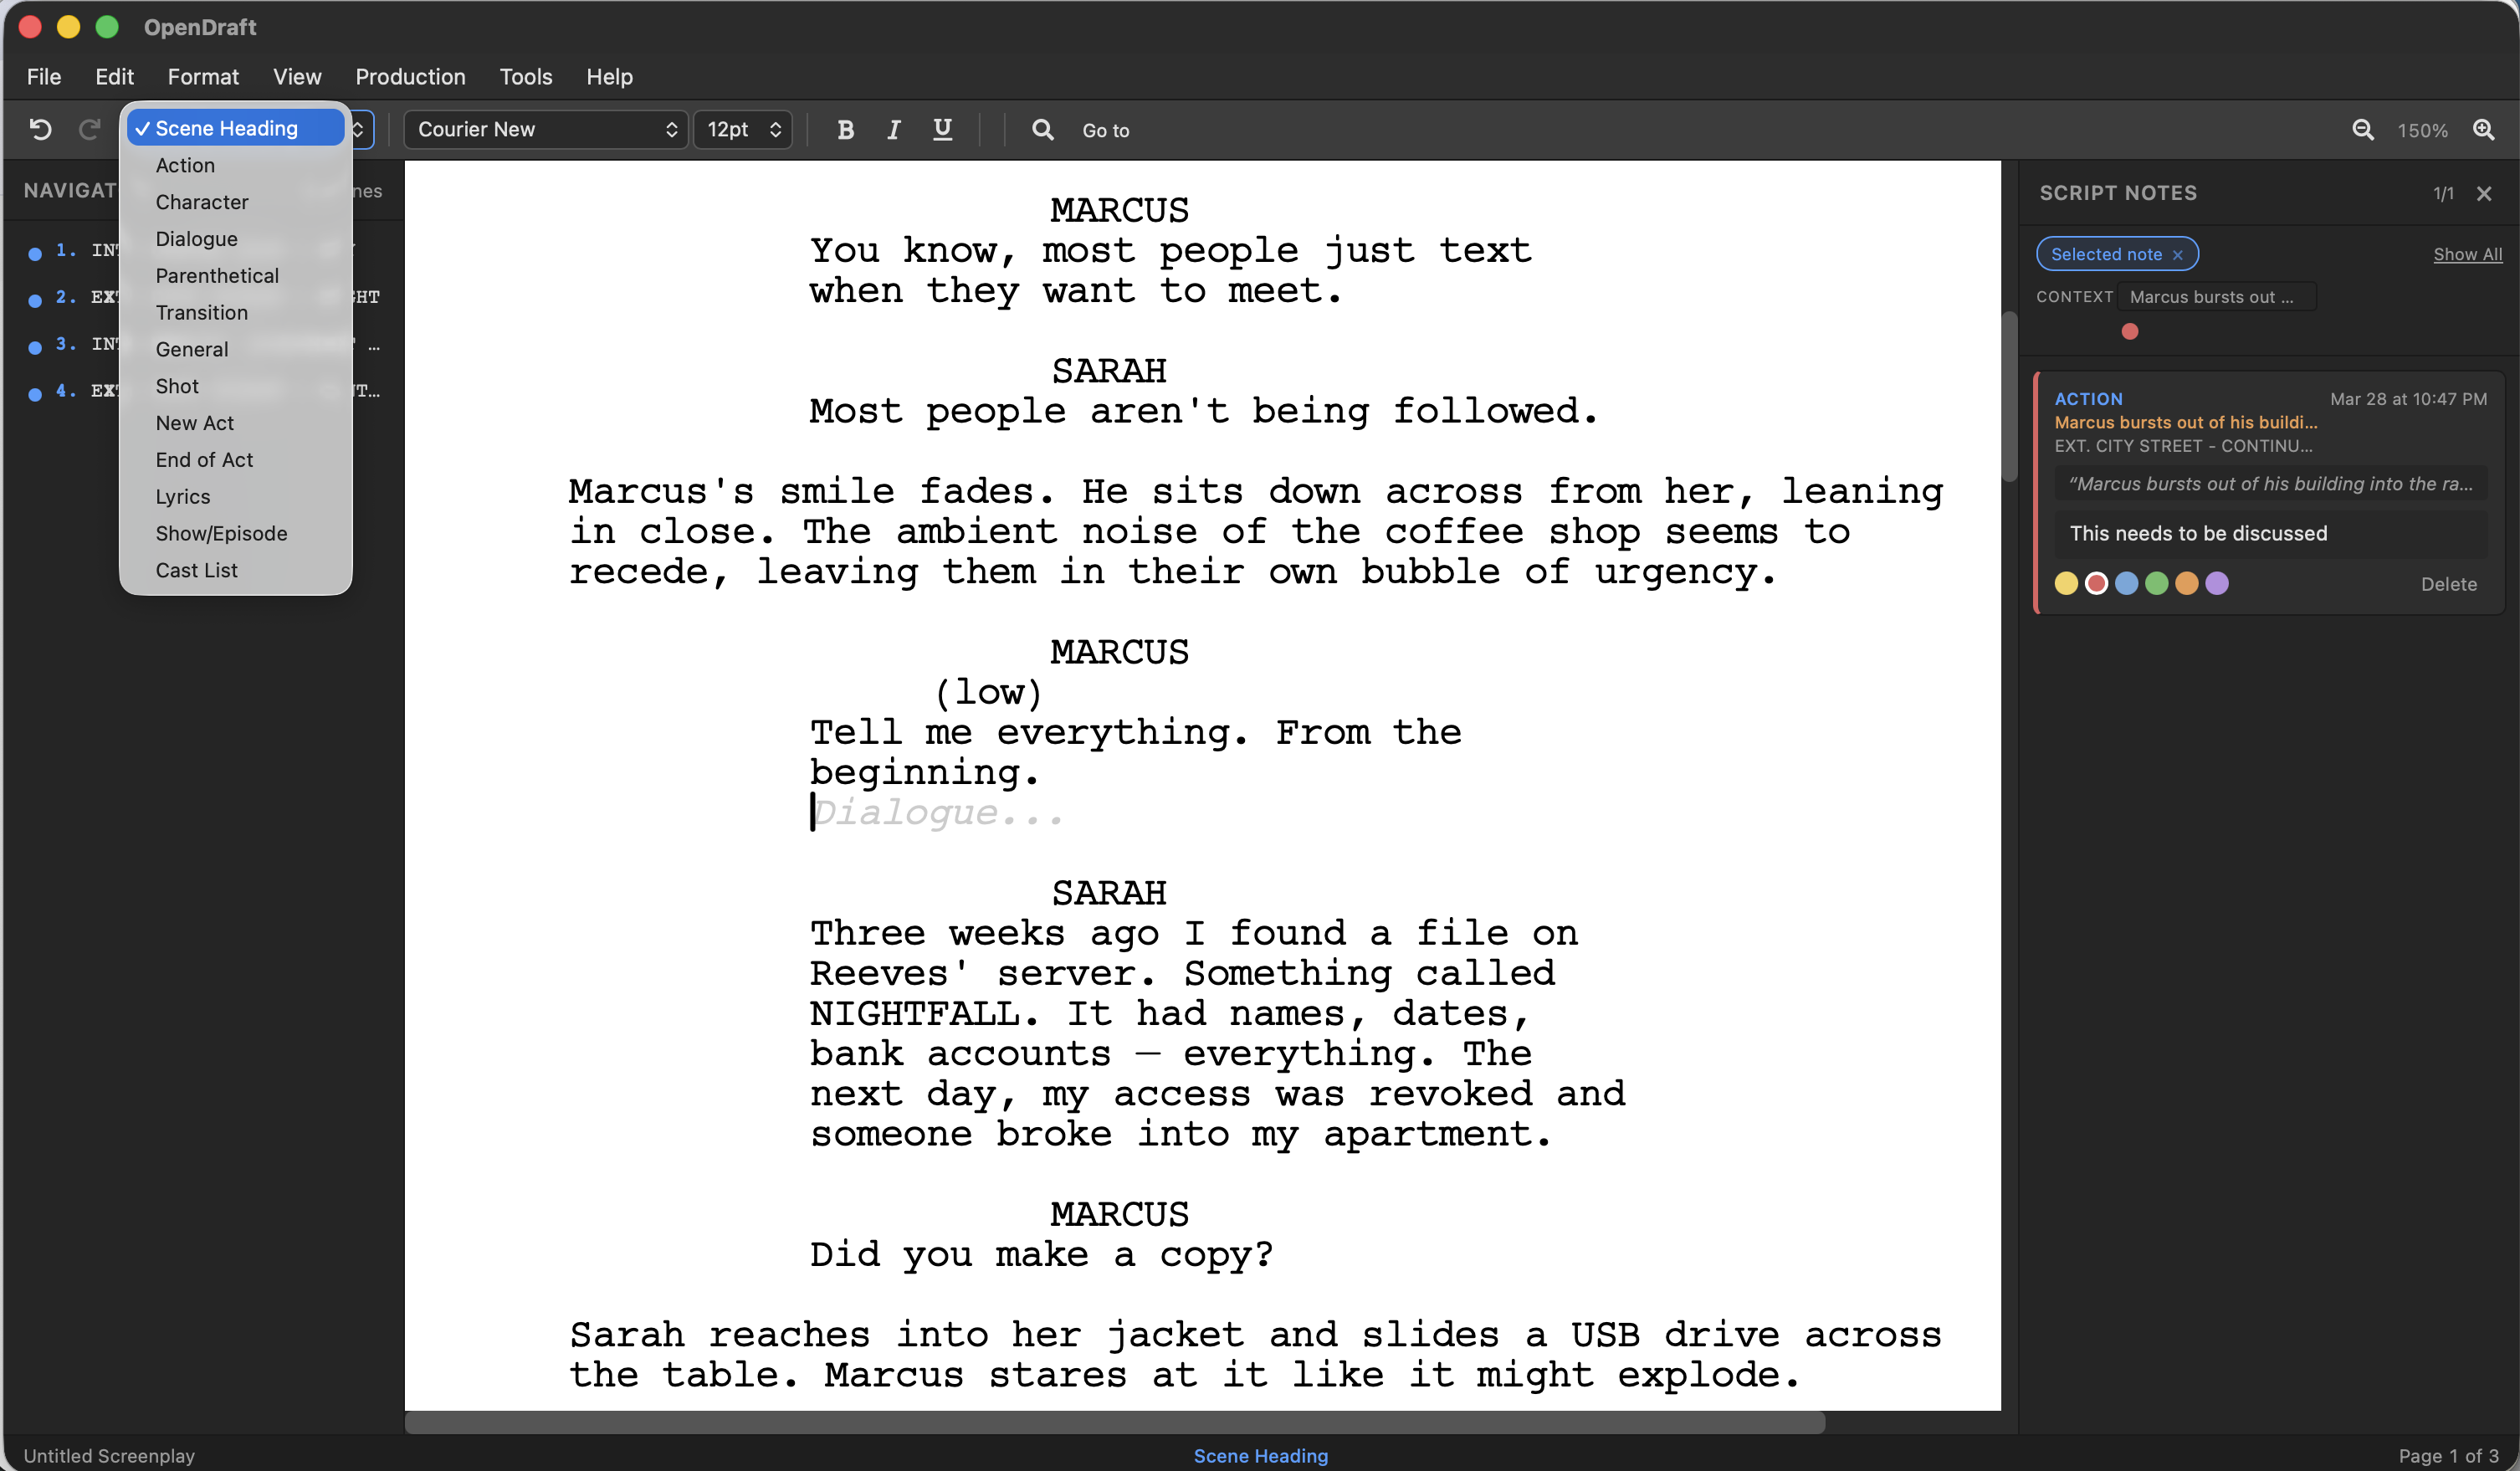
The OpenDraft editor works like a word processor designed specifically for screenwriting. Your script is displayed as formatted pages, exactly as it would appear in print. As you type, text automatically flows between pages.
Key behaviors:
- The editor shows a paginated view — you see actual page breaks as you write.
- The page count is displayed in the status bar at the bottom.
- Use ⌘G to go to a specific page.
- Zoom in or out using the zoom control in the toolbar (50%–200%).
Screenplay Elements
Screenplays use specific element types for different kinds of content. Each element has its own formatting (font size, alignment, margins) following industry standards.
Primary Elements
| Element | Shortcut | Description | Example |
|---|---|---|---|
| Scene Heading | ⌘1 | Establishes location and time of day. Always uppercase. | INT. OFFICE - DAY |
| Action | ⌘2 | Describes what we see and hear. Regular paragraph text. | Sarah enters the room, slamming the door behind her. |
| Character | ⌘3 | The name of the character who is speaking. Centered and uppercase. | SARAH |
| Dialogue | ⌘4 | What the character says. Centered, narrower margins. | I can't believe you did that. |
| Parenthetical | ⌘5 | Acting direction within dialogue. In parentheses. | (whispering) |
| Transition | ⌘6 | Editing transitions. Right-aligned and uppercase. | CUT TO: |
| General (Unformatted text) | ⌘7 | Full-width text with no screenplay formatting, and indentation you type is kept. For anything that does not fit another element — onscreen records, archival entries, notes. Called General in Final Draft and Normal Text in Fade In. | Any text that doesn't fit another category. |
| Shot | ⌘8 | Camera directions. Uppercase. | ANGLE ON - the letter on the table |
Additional Elements
These elements are available from the Format menu (no keyboard shortcuts):
- New Act — Marks the beginning of a new act (common in TV scripts).
- End of Act — Marks the end of an act.
- Lyrics — For song lyrics within the script.
- Show/Episode — Show title or episode information.
- Cast List — Lists of cast members.
Outline Elements (Not Printed)
Two elements exist to organise the script rather than to appear in it. Neither is included when you print or export to PDF, Word, Final Draft or Open Screenplay Format, and neither counts towards the page count or the script statistics.
-
Section — An outline heading. Sections nest: the Scene Navigator's
Structure tab shows them as a tree with the scenes filed under each one.
In a Fountain file a Section is a line beginning with one or more hashes
(
# ACT ONE,## Sequence One), and the number of hashes is its depth. Use a Section for structure you want to navigate by; use New Act for an act break the reader is meant to see on the page. -
Note — An aside to yourself, kept in the file and left off the page.
This is Fountain's
[[ double bracket ]]note. For notes anchored to a particular run of text, with colours and a panel of their own, use Script Notes instead.
A Synopsis is a third piece of outline that is not printed. It is not an
element of its own — it belongs to a scene heading or a Section, and is written in
Fountain as a line beginning with =. Scene synopses are shown and edited from the
Scene Navigator.
Switching Element Types
There are four ways to change the element type of the current line:
- Keyboard shortcut — Press ⌘1 through ⌘8 for the primary elements.
- Toolbar dropdown — Click the element type dropdown in the toolbar and select from the list.
- Format menu — Go to Format and select the element type.
- The element menu — Press ⌥⏎ (AltEnter on Windows and Linux), or press Enter on a blank line. See below.
Auto-switching: After pressing Enter on certain elements, the type automatically changes. For example, after a Scene Heading, the next line becomes Action. After a Character name, it becomes Dialogue.
The Element Menu
The element menu is a short list of element types that opens at the cursor, with the type the line is already on at the top. Choose a row and the line becomes that element.
It opens two ways:
- Press Enter on a blank line. This is the common one — you have finished a speech, pressed Enter, and the menu asks what comes next.
- Press ⌥⏎ (AltEnter on Windows and Linux) anywhere — on a blank line or in the middle of a line that already has text, where it is simply a type chooser. You can change this shortcut in Settings → Editing by clicking the box and pressing the keys you want.
Blank Lines
Sometimes Enter on a blank line should just mean another blank line — extra space before a scene, or room to think. Any of these gives you the line rather than a change of element:
- Press Enter again without choosing anything. The menu opens with nothing selected, so a second Enter inserts the line.
- Choose the Blank Line row at the foot of the menu. This is the one to tap on a phone or tablet.
- Choose the element the line is already on — the top row.
- Press Esc to close the menu, then Enter.
- Simply keep typing. Any other key closes the menu and the character goes into the line.
Once a line already follows a blank line, the menu stops asking: Enter inserts blank lines straight away, however many you want. The menu only offers itself on the first one.
Prefer it never to open? Turn off Offer the element menu when I press Enter on a blank line in Settings → Editing. Enter then always inserts a plain line, and ⌥⏎ remains the way to reach the menu when you want it.
Character Autocomplete
When typing a Character element, OpenDraft suggests character names that already appear in your script. Start typing and select from the dropdown suggestions to ensure consistent spelling.
Handwriting with an Apple Pencil (iPad)
Choose Edit → Handwriting… — or Handwriting… on the three-finger context menu — to open a large, empty writing box. Write in it with your Apple Pencil at whatever size is comfortable; when you tap Insert, what you wrote is placed in the script at your cursor. If you had text selected, the handwriting replaces that selection.
The box is a floating panel, not a dialog. It stays open while you work, and the script behind it stays live, so a whole pass over a scene takes one panel rather than one per edit:
- Tap anywhere in the script to move where the text will go. The panel follows your cursor — the preview at the top of it updates, and the caret on the page shows the spot.
- Insert leaves the panel open and empty, with the cursor after what it just inserted, ready for the next line.
- Drag the panel by its title bar to move it off the part of the page you are working on. Drag the bottom-right corner to make it bigger or smaller. Where you leave it and the size you gave it are both remembered. Made narrow, the buttons along the bottom keep their icons and drop their words, so they still fit.
- The script does not move when you insert. The page stays exactly where it was, so what you just added is where you were already looking. Keeping the panel clear of the line you are working on is what dragging and resizing it are for.
- Preview hides or shows the picture of the script around your cursor, if you would rather have the space to write in.
- Clear empties the writing box without closing the panel — useful when a word came out wrong. ×, or Esc, closes the panel; nothing else does, so a stray palm or Pencil tip cannot throw away what you have written.
- Write several lines and each becomes its own paragraph, in the element your cursor was in.
- Write a single line and it is inserted into the sentence you were already in, spaced into it — write (CONTINUOUS) at the end of a scene heading and you get INT. KITCHEN - DAY (CONTINUOUS), not DAY(CONTINUOUS). Punctuation stays put: a word written in front of a full stop does not push it away.
Seeing the page through the panel
The panel floats over the script it is being used to edit, so how much of the page it hides is your choice. The gear in its title bar opens three settings:
- Panel — how solid the panel itself is. Turn it down and the script shows through the whole thing.
- Writing area — the same for the box you write in, and it goes all the way to clear. With it turned right down you can read the line you are adding to straight through the place you are writing.
- Ink — what colour your handwriting comes out in. Once the page shows through, handwriting in the same colour as the text behind it is hard to read; blue, red, green or purple stay legible against the script.
These are remembered, so the panel opens the way you last left it.
Why not write straight onto the page? iPadOS decides how big a Scribble writing area to give you from the blank space it finds around your cursor. In the middle of a script there is very little — often just the tail of the current line — and writing past it can replace the text that follows instead of making room. The handwriting box has nothing after the cursor to replace, so it is always safe and always big enough.
Adjusting a selection on iPad
Press and hold a word to select it, and a handle appears at each end of the selection. Drag either one to take in more or less text; drag one past the other and the selection turns around, the way it does elsewhere on the device. The selected text stays highlighted while you reach for a menu or while the keyboard comes and goes, so you can always see what a command is about to act on.
Undo and Redo
- ⌘Z — Undo your last action
- ⇧⌘Z — Redo (bring back what you undid)
You can undo and redo multiple steps. The full history is available as long as the editor is open.
Selecting Text
- ⌘A — Select all text in the screenplay
- Click and drag to select specific text
- Double-click a word to select it
- Triple-click a line to select the entire paragraph
On iPhone and iPad, a selection carries a handle at each end. Drag either one to widen or narrow the selection a word or a letter at a time, without having to start the selection again.
Right-Click Context Menu
Right-clicking in the editor opens a context menu with quick access to:
- Format Panel (change element formatting)
- Spell check suggestions (if a misspelled word is selected)
- Cut, Copy, Paste
Distraction-Free Writing Mode
When you want to focus entirely on your writing, OpenDraft offers a distraction-free mode that hides the menu bar and toolbar, giving you a clean, full-screen writing experience with nothing but your screenplay on the page.
Activating Distraction-Free Mode
Go to View > Menu & Toolbar > Hidden to enter distraction-free mode.
In this mode:
- The menu bar and toolbar are completely hidden.
- Only a small hamburger menu button (☰) remains in the top-left corner for accessing menus when needed.
- The status bar at the bottom still shows your project name, script title, and current page count.
- The full screen is dedicated to your screenplay pages — no buttons, dropdowns, or controls in the way.
This is especially useful on mobile devices and tablets, where screen space is limited and you want every pixel dedicated to your writing.
All Toolbar Modes
OpenDraft offers three toolbar display modes under View > Menu & Toolbar:
| Mode | Description |
|---|---|
| Comfortable | Full menu bar and toolbar visible. Best for when you need frequent access to formatting controls and menus. |
| Compact | Reduced toolbar height with smaller controls. Good balance between access and screen space. |
| Hidden | Menu bar and toolbar completely hidden. Only the hamburger menu (☰) remains. Maximum writing space with zero distractions. |
Tip: You can still access all menus in Hidden mode by clicking the hamburger button (☰) in the top-left corner. All keyboard shortcuts continue to work as well — so you can format text, switch elements, find and replace, and more without ever leaving distraction-free mode.
Tips for New Screenwriters
- Scene headings always start with
INT.(interior),EXT.(exterior), orINT./EXT.(both), followed by the location and time of day. - Action lines should describe only what the audience can see and hear. No internal thoughts.
- Character names are always in ALL CAPS the first time they appear in an action line, and always in the Character element.
- One page equals roughly one minute of screen time.
- Use parentheticals sparingly — only when the dialogue would be misread without them.